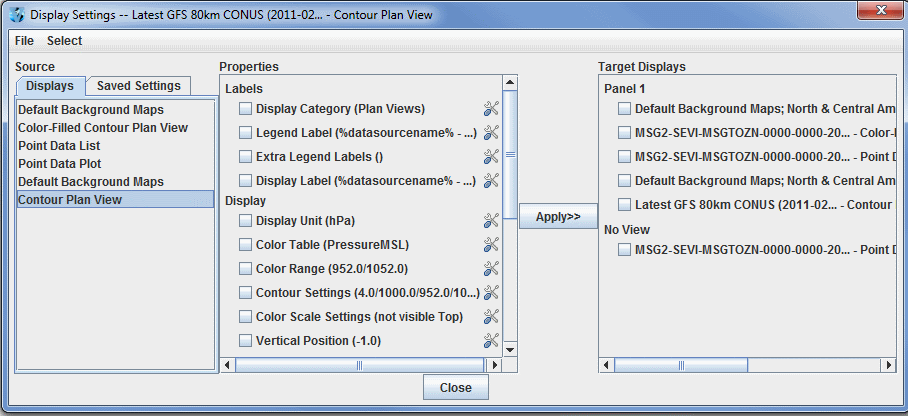
Image 1: Display Settings Dialog
The Display Settings facility allows you to select a set of properties from a display control (e.g., color table, contouring info, isosurface value, label template, etc.) and apply them to other display controls and/or save them as preferences to be used when creating new display controls.
The Display Settings dialog can be opened with the Edit->Display Settings... menu in the Layer Controls tab of the Data Explorer.

The left panel in this window is titled Source and includes two tabs, Displays and Saved Settings. The Displays tab includes all of the display types currently loaded into McIDAS-V. This tab is useful to make display settings changes within a session. If you wish, you can save these settings to be used in future sessions by using the File->Save Selected Properties menu item. The Saved Settings tab includes a list of any saved display settings you have made in previous sessions. You can store several different saved settings at once by grouping them into different categories.
The center panel of the window is titled Properties. These are the properties of the currently selected display control, which is shown highlighted in blue in the Source panel. On the right is also a list of target display controls.
The purpose of this is that you can select properties in the Properties panel that you want
to apply to the selected target display controls (via the checkboxes) on the
right. Many of the properties can be changed by clicking on the  buttons.
The View menu is useful for selecting different groups of target display controls. For example, you can select All Displays, displays of certain types, displays that have the same data sources, etc.
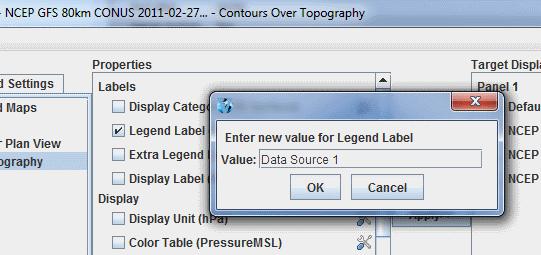
If you have two different data sources loaded with several displays created from each, normally the legend will list all of the displays based on some display category (e.g., Plan Views). However, you can change their display category so that each group of displays that are from one data source have the same category (e.g., "Data source 1", "Data source 2"). You can do this by changing the "Display Category" property under "Labels" to "Data Source 1".

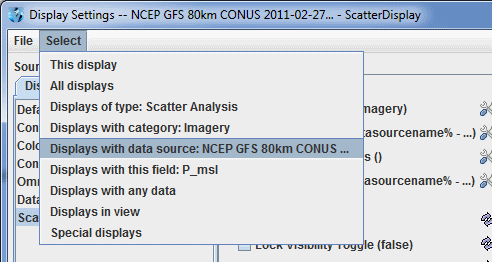
Then, you could manually select the displays you want to change, or use the Select menu and choose "Displays with data source: ...":

This selects the displays with the data source of the currently selected display.
Once selected, you then hit ![]() , and the "Display
Category" will be set on the selected display controls.
, and the "Display
Category" will be set on the selected display controls.
To do the next set of displays, select a new Source display control in the list on the left. This will select this display and reset the properties list in the middle. Then, when you click Select->Displays with data source, the displays that share the data source from this new display will be selected.
You can save the set of selected settings with the File->Save Selected Properties option. The Save Display Settings dialog will be shown:

You can enter a category and a name. The saved settings will be shown under the Saved Settings tab. When selected they will be applied to the list of properties on the left. If you select the checkbox for Applicable only to displays of type, only the display listed will be an option in the Displays panel of the Field Selector.
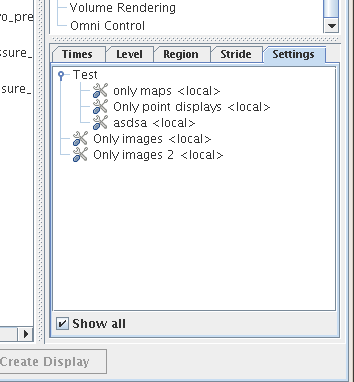
The set of saved display settings are also shown in the Field Selector:

You can select any number of these, and when a new display control is created, these settings will be applied to the new display. The Show All checkbox allows you to list all of the settings, regardless if they were saved for a particular type of display.
Many of the menu items seen utilizing this display are standard options that can be found in the Menus section of the Layer Controls page. However, there are several options unique to this display.
The File menu has this unique option:
The Select menu has these unique options: