Version 2 Switching to Secondary Hard Drive
Tools and Equipment Required
- Large phillips screwdriver
- Large flathead screwdriver
- Small phillips screwdriver
- Fine tip sharpie
- Anti-static wrist strap
- Radmin software
Precaution
- Be careful not to damage cables connected to the back of the computer chassis when pulling forward.
- The computer chassis temperature sensor is especially vulnerable and must be disconnected.
- Other cables may need to be removed if they are not long enough to fully pull out computer chassis.
Procedure
- Verify second hard drive is present.
- Remove the filter plate on front of computer chassis by turning the screws half a turn (see Fig. 1).
- Remove black filter (see Fig. 2).
- Verify secondary hard drive is installed with power and IDE cable attached (see Fig. 3).
- Reinstall black filter.
- Reinstall filter plate.
- Open computer chassis and swap IDE cable connections on motherboard.
- Turn off the power to the computer via the power switch in the bottom left on the back of the computer chassis or just unplug the power cable back there (see Fig. 4).
- Go to the back of the electronics rack and remove the 3 computer chassis cover screws (see Fig. 4).
- If computer chassis temperature sensor is not mounted via one of these screws ensure it is disconnected. On the example photo the location it was connected was clearly marked by the arrows since we have broken this sensor in the past by not removing it.
- Remove the 4 screws for the computer chassis on the front of the electronics rack (see Fig. 1).
- Slowly pull the computer chassis forward out from electronics rack using the silver handles. Do not remove it from the rails.
- Disconnect or free any cables from the back of the computer chassis that inhibit it from being pulled forward.
- Slightly push the computer chassis cover back and lift up to remove.
- Label the top IDE hard drive cable connection on the motherboard as “TOP” and remove both cables (see Fig. 5).
- Be sure to wear an anti-static wrist strap as to not damage any of the electronics accidentally.
- Connect the “Top” cable to the bottom connector and the bottom cable to the top connector on the motherboard (see Fig. 6).
- This will make the secondary drive the primary drive and we may be able to still retrieve data not collected from the old drive.
- Close and reinstall computer chassis.
- Reinstall computer chassis cover.
- Push the computer chassis back into the electronics rack.
- Reconnect any cables removed including the computer chassis temperature sensor and the 3 screws for the computer chassis cover (see Fig. 4).
- Install the 4 Computer Chassis screws (see Fig. 1).
- Once power is restored the computer should boot up to secondary drive.
- Please run “stkill” and then “wdtdis” from the Quick launch menu to the right of the start button.
- Setup network settings and install Radmin.
- Please set both Local Area Connection and Local Area Connection 2 to have identical networking information. IP address is 10.1.137.6
- that way it doesn’t matter what port you plug the network into
- Contact Mentor to install correct configuration for that system and coordinate with Tim Grove any additional software that needs to be installed.
- Please set both Local Area Connection and Local Area Connection 2 to have identical networking information. IP address is 10.1.137.6
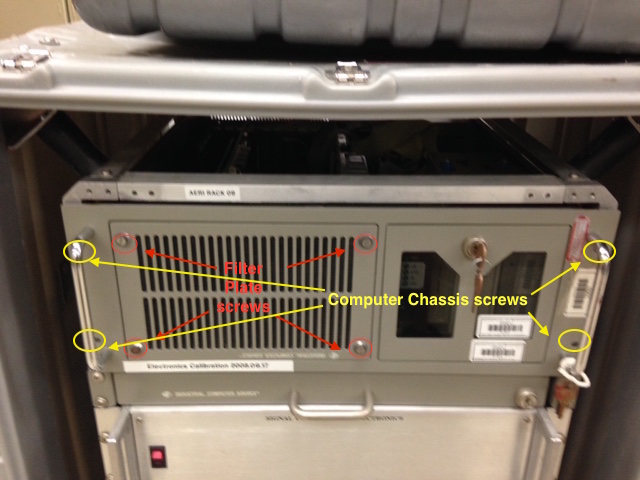
Figure 1. Version 2 AERI Computer Chassis with filter plate and chassis screws identified.

Figure 2. Version 2 AERI computer chassis filter.

Figure 3. Version 2 AERI secondary hard drive.
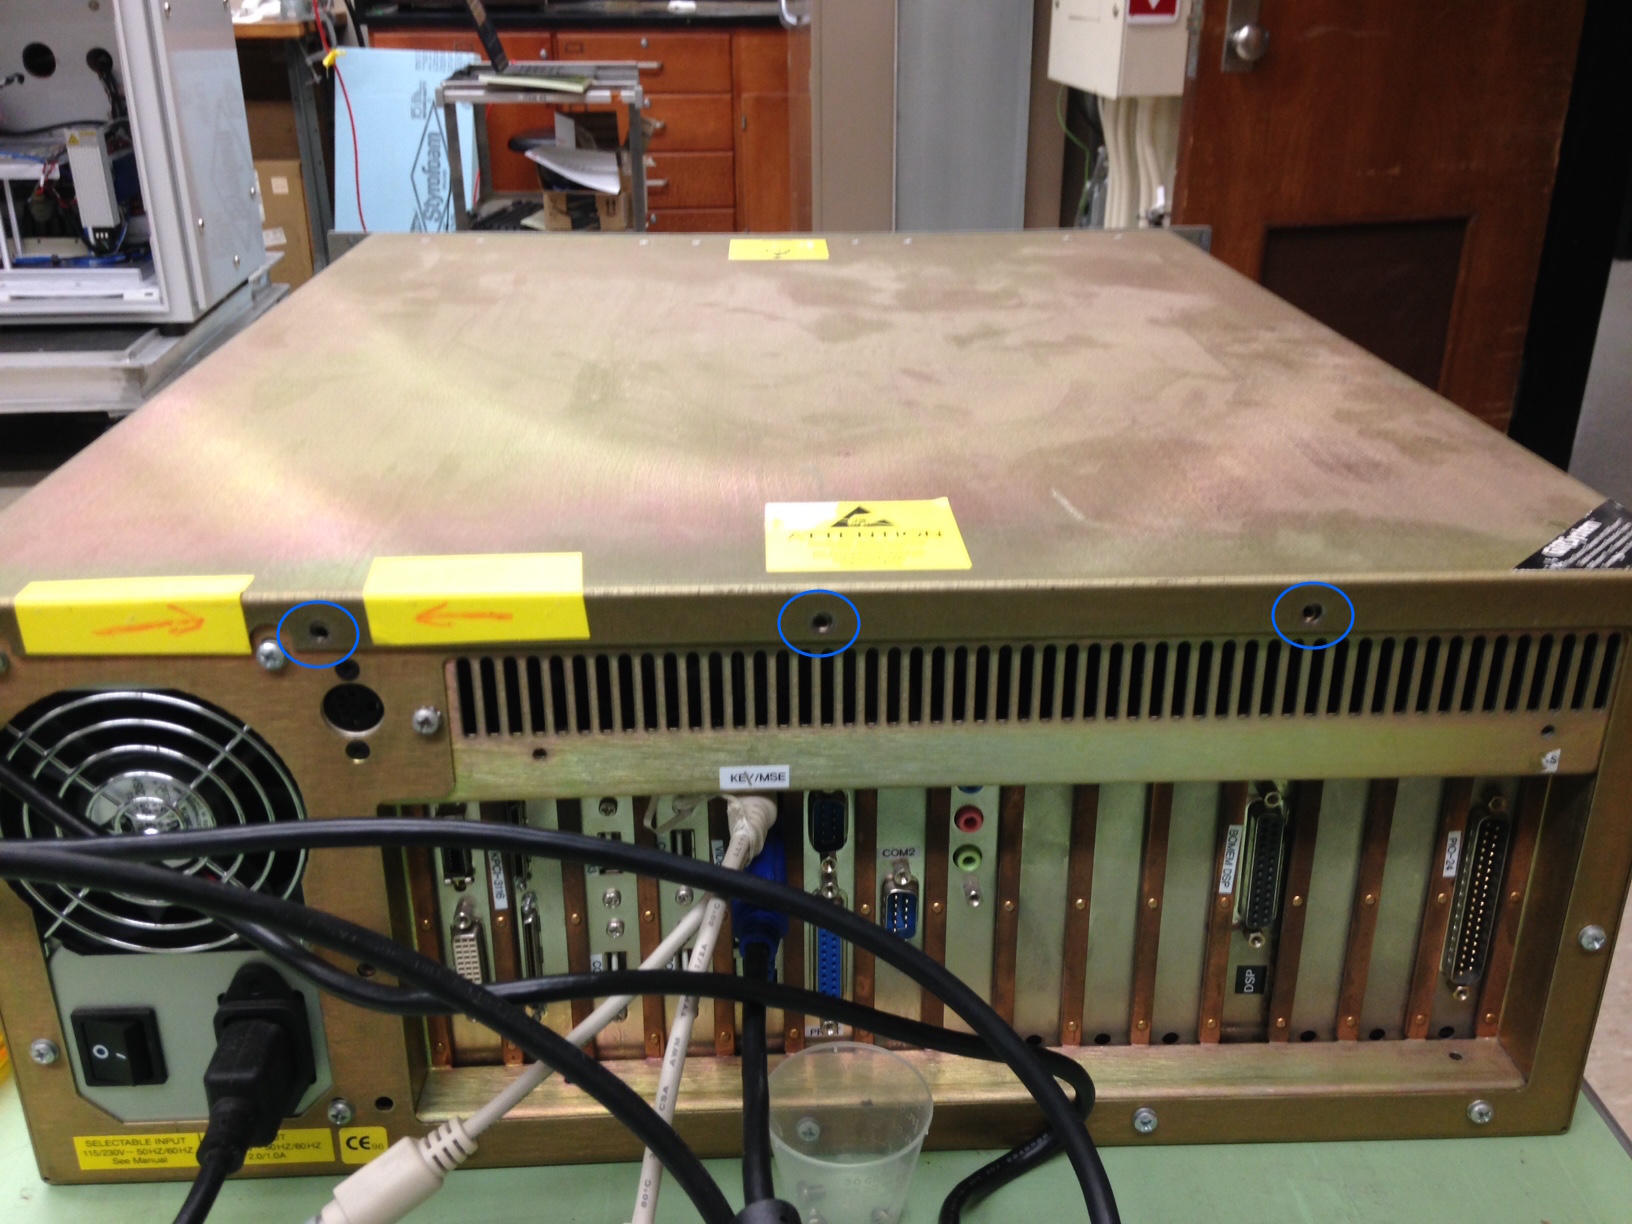
Figure 4. Version 2 computer with cover screws identified.
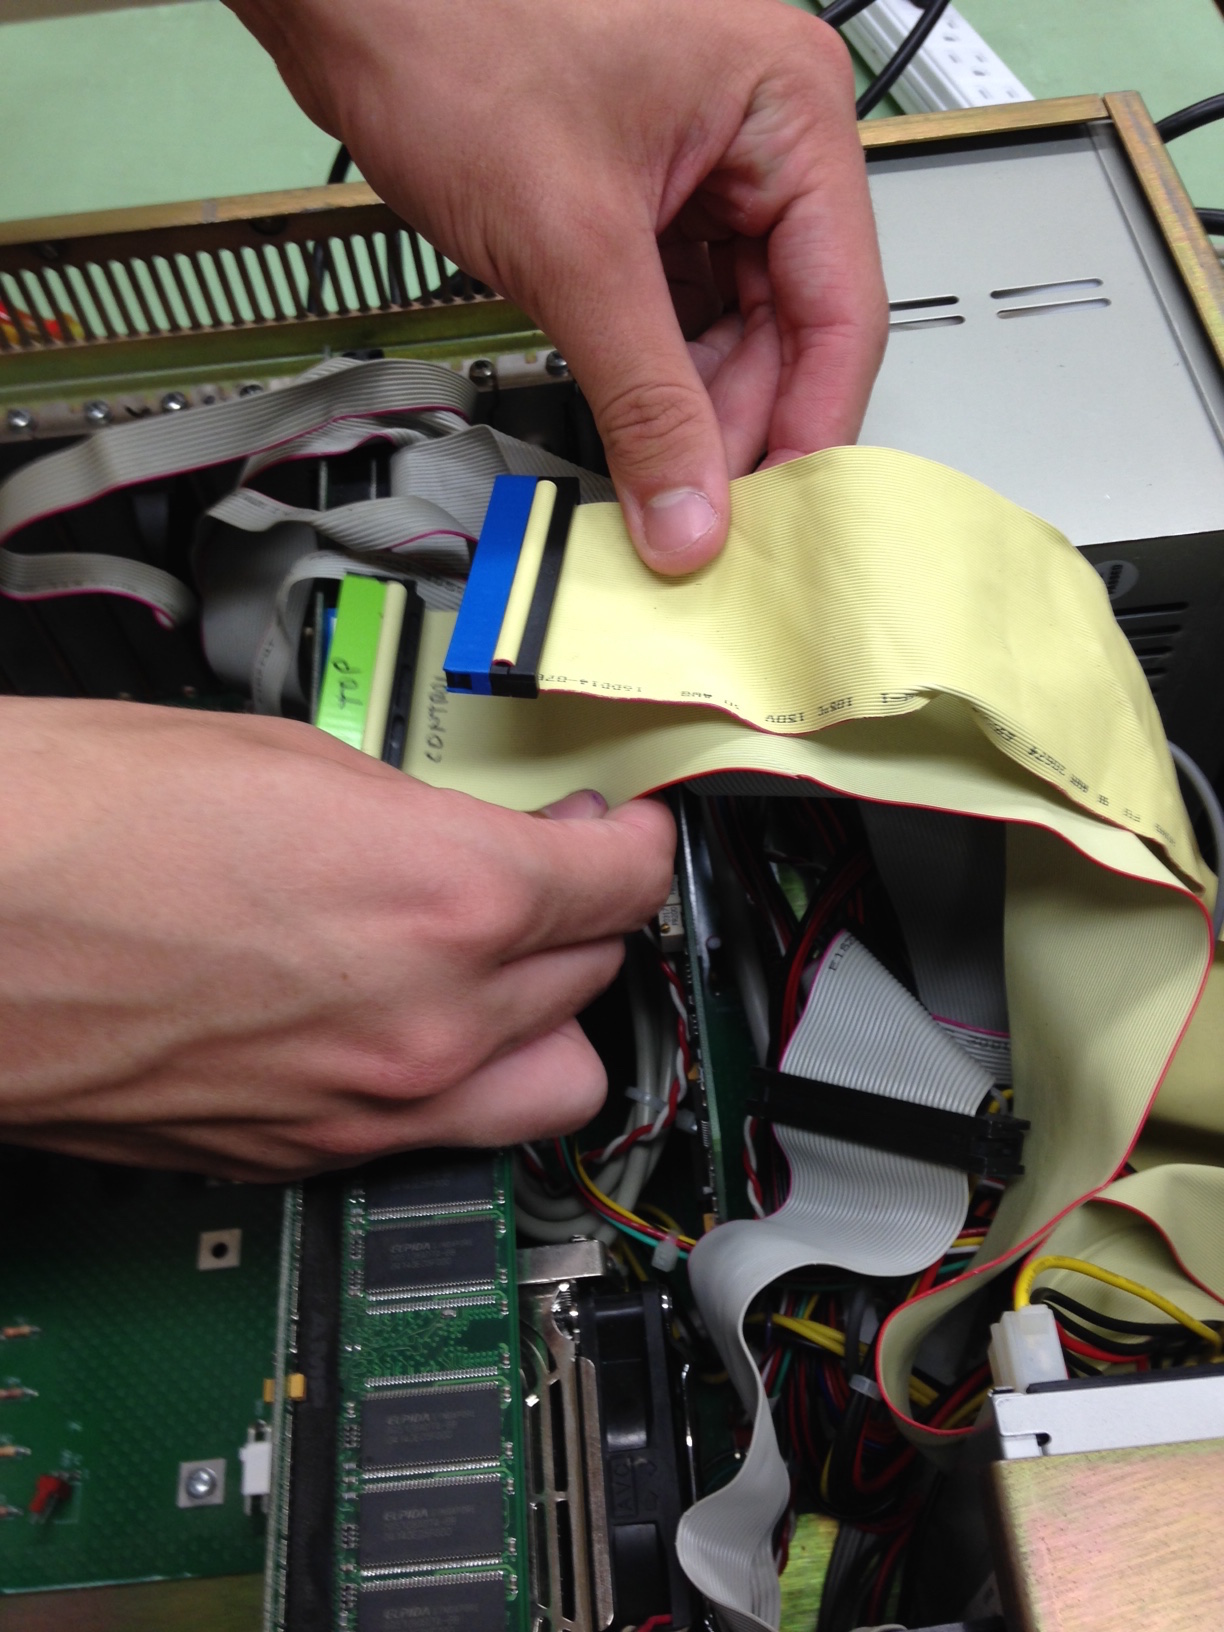
Figure 5. Swap top and bottom Version 2 computer hard drive IDE cables.

Figure 6. Version 2 computer hard drive IDE cables installed with bottom cable moved to top connector.